 CSS only Duck Hunt game
CSS Duck Hunt was the first game I submitted to ‘CSS only’ Mozilla Dev Derby over one year ago. It didn’t win anything, but I was glad that I managed to develop a nostalgic game in a rather unique way. Since then, some people have asked me to explain how this game works.
At the beginning I had only a very general idea about what I wanted to accomplish. Everything except for the flying bird and the gun were supposed to be static images. After implementing the duck’s movement and the process of shooting it, I started thinking about a more complex solution.
Birds and dog
Lets start with the basics. The core of this game is *just* flying ducks and the capability to shot them with the gun. I think it was the easiest part ;). I prepared an animated gif with a flying duck and styled it as a background of label of input element.
<form autocomplete="off">
	<div>
		<input type="radio" name="duck_1" id="duck_1" class="duck"/>
		<label for="duck_1"></label>
		<!-- other important markup !-->
	</div>
	<div>
		<input type="radio" name="duck_2" id="duck_2" class="duck"/>
		<label for="duck_2"></label>
		<!-- other important markup !-->
	</div>
	<div>
		<input type="radio" name="duck_3" id="duck_3" class="duck"/>
		<label for="duck_3"></label>
		<!-- other important markup !-->
	</div>
</form>
Most of the game’s elements are located inside form. Each duck is de facto an invisible input element, which is represented by its label - with the mentioned gif as a background and crosshair cursor to imitate gun’s viewfinder.
.duck {
	display:none;
}

input.duck + label {
	position: absolute;
	display: block;
	top: 140px;
	left: 430px;
	width: 45px;
	height: 41px;
	cursor: crosshair;
	z-index: 6;
	background: url('./img/duck.gif') top left no-repeat;
}
As you can see, the bird’s labels are positioned absolutely and located outside, on the right side of the main div within the game area. Each duck has its own styles with a unique flying animation.
/* Duck no 1 */

input#duck_1 + label{
	-animation: duck_1 6s linear 3s;
}

@keyframes duck_1{
	0% { top: 140px; left: 430px; opacity: 1;}
	20% { top: 140px; left: 140px; opacity: 1;}
	40% { top: 140px; left: 385px; opacity: 1;}
	60% { top: 100px; left: 120px; opacity: 1;}
	80% { top: 100px; left: 385px; opacity: 1;}
	90% { top: 100px; left: 160px; opacity: 1;}
	100% { top: 0px; left: 200px; opacity: 0;}
}
The first bird will show up 6 seconds after the page loads and the ‘GAME START’ title disappears. The whole animation of that particular duck will last 3 seconds and during that time, the duck will move across the game area from certain points, which are specified in duck_1 animation. In the last step (100%), the uncaught bird will disappear on the top of the game area, so that’s why opacity is set to 0. The browser will animate not only the movement of bird but also its smooth process of going invisible.
More information about CSS animations can be found on w3.org.
But what will happen when the user shots the duck? How does the shooting process work? It’s very simple. As you remember, each bird is represented as an <input type="radio"> element and its label. When the user clicks on that label, corresponding input will be checked, but from now on, it can be styled differently:
input#duck_1:checked + label {
	display:none;
}
This mechanism reminds me of some kind of conditional statements in programming languages:
if (X) {
    doSomething();
} else {
    doSomethingElse();
}
In my example this could be used as:
if (duck and its label is clicked) {
	// do not show that duck
    display:none;
} else {
	//continue with the animation, until the duck disappears on the top
    -animation: duck_1 6s linear 3s;
}
This is the core of this game, a simple conditional statement which is based on the input's state. As you will see, this logic is used in the majority of the game’s elements.
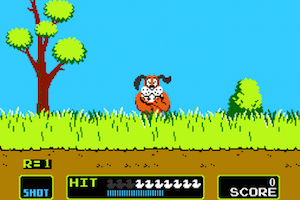
Very similar to this, is the dog’s animation. Every duck has its own dogs represented as a div elements with derisive or pleased static gifs of hunting hound:
<div>
	<input type="radio" name="duck_1" id="duck_1" class="duck"/>
	<label for="duck_1"></label>
	<div class="dog_catch"></div>
	<div class="dog_laugh"></div>
</div>
.dog_catch {
position: absolute;
width: 59px;
height: 66px;
pointer-events: none;
background: url('./img/dog_catch.gif') top left no-repeat;
top: 250px;
left: 180px;
z-index: 3;
}
@keyframes dog_catch {
0% { top: 250px; }
30% { top: 182px; }
70% { top: 182px; }
100% { top: 250px; }
}
#duck_1 ~ .dog_laugh {
animation: dog_laugh 1.5s linear 9s;
}
#duck_1:checked ~ .dog_laugh {
display: none;
}
#duck_1:checked ~ .dog_catch {
animation: dog_catch 3s linear 1s;
}Using ~ selector we can select any .dog_catch element, as long as they follow a checked #duck_1. So it means that after shooting a duck, the pleased dog will start his animation and show caught bird.
However, if the duck hasn’t been shot, the laughing hound will appear to make fun of you ;). To better understand it, I can use a conditional statement:
if (duck and its label is clicked) {
	// do not show laughing dog
    .dog_laugh { display:none; }
	//start animating pleased dog
	.dog_catch { animation: dog_catch 3s linear 1s; }
} else {
	//by default, show laughing dog
    .dog_laugh { animation: dog_laugh 1.5s linear 9s; }
}
Ammunition and shots
Now let’s continue with something a little more complicated. In the left bottom corner of the screen, there is place with ammunition, representing number of available shots. Each player has three chances to catch the duck, if he/she doesn’t kill it, then the bird’s label gets pointer-events: none style, so from now on, clicking event won’t be effective. It’s something like event.preventDefault() in JavaScript.
<div>
	<input type="radio" name="shot_1_1" id="shot_1_1" class="shot"/>
		<label for="shot_1_1"></label>
	<input type="radio" name="shot_1_2" id="shot_1_2" class="shot"/>
		<label for="shot_1_2"></label>
	<input type="radio" name="shot_1_3" id="shot_1_3" class="shot"/>
		<label for="shot_1_3"></label>
	<input type="radio" name="duck_1" id="duck_1" class="duck"/>
		<label for="duck_1"></label>
	<div class="dog_catch"></div>
	<div class="dog_laugh"></div>
	<div class="ammo" id="ammo_1_1"></div>
	<div class="ammo" id="ammo_1_2"></div>
	<div class="ammo" id="ammo_1_3"></div>
</div>#ammo_1_1,
#ammo_1_2,
#ammo_1_3 {
animation: ammo 0.1s linear 9s;
animation-fill-mode: forwards;
z-index: 6;
}
@keyframes ammo {
0% { z-index: 6; }
99% { z-index: 6; }
100% { z-index: 0; }
}Each set of ammunition (3 for 1 duck) has to be shown after killing or missing each duck. I can’t animate ‘display’ values so I figured out to replace it with z-index property. When the new duck apears, the ammunition has to be visible, so each ammo’s div gets the highest needed z-index value, which in this particular example is 6.
Ok, but how can we detect if the bird wasn’t killed? My solution was to prepare 3 shot inputs (1 per 1 shot/ammo) with labels as big as the game area, which will be under (lower index) the flying duck. When the new duck appears, related shots layer will get their heights (remember that I can’t animate display values) values set to 230px. When the current bird dissapears, shot layers's height has to be 0px to the end of the game. That’s why I used animation-fill-mode: forwards, according to the documentation, it will retain the computed values set by the last keyframe encountered during execution.
input#shot_1_1 + label {
	z-index: 3;
	height: 230px;
}

input#shot_1_2 + label {
	z-index: 2;
	height: 230px;
}

input#shot_1_3 + label {
	z-index: 1;
	height: 230px;
}

input#shot_1_1 + label,
input#shot_1_2 + label,
input#shot_1_3 + label {
	animation: shot 0.1s linear 9s;
	animation-fill-mode: forwards;
}

@keyframes shot {
	0% { height: 230px; }
	99% { height: 230px; }
	100% { height: 0px; }
}
If the player misses the animated duck, a visible shot input with highest z-index will be checked and in the aftermath its nearest label (+ selector) and ammunition will disappear. After clicking on the third shot layer, the duck’s label will get pointer-events: none;, so it won’t be clickable.
input#shot_1_1:checked + label,
input#shot_1_2:checked + label,
input#shot_1_3:checked + label {
	display:none;
}

input#shot_1_1:checked ~ #ammo_1_1,
input#shot_1_2:checked ~ #ammo_1_2,
input#shot_1_3:checked ~ #ammo_1_3 {
	display: none;
}

input#shot_1_3:checked ~ input.duck + label {
	pointer-events: none;
}
The whole shooting process can be explained as followed:
if (duck and its label is clicked) {
	//continue with 'ammo' and 'shot' animation, those elements will dissapear soon
} else if (duck is missed for the first time) {
	//hide first shot layer
    input#shot_1_1:checked + label { display:none; }
	//hide first ammo
	input#shot_1_1:checked ~ #ammo_1_1 { display: none; }
} else if (duck is missed for the second time) {
	//hide second shot layer
    input#shot_1_2:checked + label { display:none; }
	//hide second ammo
	input#shot_1_2:checked ~ #ammo_1_2 { display: none; }
} else if (duck is missed for the third time) {
	//hide third shot layer
    input#shot_1_3:checked + label { display:none; }
	//hide third ammo
	input#shot_1_3:checked ~ #ammo_1_3 { display: none; }
	//prevent duck from clicking
	input#shot_1_3:checked ~ input.duck + label { pointer-events: none; }
}
Score and points
On the right side of ammunition area, there is another panel with ‘HIT’ caption and ten white icons of ducks, which display missed or scored shots. Missed shots are represented with grey icons, scored with red ones.
<div>
	<input type="radio" name="duck_1" id="duck_1" class="duck"/>
		<label for="duck_1"></label>
	<div class="score_miss" id="score_1_miss"></div>
	<div class="score_hit" id="score_1_hit"></div>
</div>
#score_1_miss {
opacity: 0;
animation: score 0.1s linear 9s;
animation-fill-mode: forwards;
}
@keyframes score {
0% { height: 0px; opacity: 0;}
100% { height: 12px; opacity: 1;}
}
#duck_1:checked ~#score_1_miss {
display: none;
}
#score_1_hit {
opacity: 0;
}
#duck_1:checked ~ #score_1_hit {
animation: score 0.1s linear 0.1s;
animation-fill-mode: forwards;
}It’s very simple. By default the grey icon will be shown when duck flies away. In case of a succesful shooting of the bird, the grey icon will be replaced by red one. If not, the grey icon will stay as it was declared initially in its animation property. To explain this simpler:
if (duck and its label is clicked) {
	//hide grey icon
    #duck_1:checked ~#score_1_miss { display: none; }
	//start animation to show red icon
	#duck_1:checked ~ #score_1_hit {
		animation: score 0.1s linear 0.1s;
		animation-fill-mode: forwards;
	}
} else {
	//continue with grey animation and leave it visible
    #score_1_miss {
		animation: score 0.1s linear 9s;
		animation-fill-mode: forwards;
	}
}
Counting points is a little bit more tricky. I prepared an image with a list of all possible points from 0 to 10000, which you can get during play and I used it as a background of div.points_bg element. This div is located inside div.points_wrapper element, which acts like some kind of window, because its height is set to 14px so it can show only one row of score number. At the beginning of the game, only the lowest part of score image will be visible, so a player always starts with 0 points.
Despite div.points_bg there are also ten radio inputs which are checked, hidden (display: none) and has 14px of height by default.
When the user clicks the duck’s label, related radio input will be marked as unchecked and new styles (display: block) will apply. It will *push* other block elements further to the bottom of page. So then div.points_bg will be *moved down* by 14px and in the end, in window element (div.points_wrapper) next row of score image will be shown.
<div class="points_wrapper">
	<div class="points">
		<input type="radio" name="duck_1" class="point" checked>
		<input type="radio" name="duck_2" class="point" checked>
		<input type="radio" name="duck_3" class="point" checked>
		<input type="radio" name="duck_4" class="point" checked>
		<input type="radio" name="duck_5" class="point" checked>
		<input type="radio" name="duck_6" class="point" checked>
		<input type="radio" name="duck_7" class="point" checked>
		<input type="radio" name="duck_8" class="point" checked>
		<input type="radio" name="duck_9" class="point" checked>
		<input type="radio" name="duck_10" class="point" checked>
		<div class="points_bg"></div>
	</div>
</div>div.points_wrapper{
width: 44px;
height: 14px;
z-index: 4;
overflow: hidden;
}
div.points_bg{
width: 44px;
height: 154px;
background: #000 url('./img/points.gif') 0% 100% no-repeat;
}
input.point{
display: block;
width: 7px;
height: 14px;
}
input.point:checked{
display:none;
}Conclusion
Making games in CSS is neither easy nor is it an effective task. The whole game is just a long animation with a few *condition statements*, which depends on whether the user shoots a duck or not. I am also aware that my version of Duck Hunt is far away from perfection. Sometimes browsers have problems with detecting shots, and in addition, if a bird animates too fast, the player can shoot more that three times. Because of its *CSS nature* we can’t pause the game, save it or restore it’s state after reloading the page.
I don’t think it’s the new way of building HTML games, on the contrary, it isn’t. But it definitely is the best way to learn something new and uncommon, to face problems you probably wouldn’t have during development of a typical website. The most important thing for me is to try new, non standard ways of building software that will teach me how to open my mind to think differently and improve creativity.
If you have any ideas on how to improve this game, add some features or make it completely different - just let me know. You can also contribute on github or comment below this article.
Appendage
A few months after my submision to MDN ‘CSS only’ contest, I found on Codepen a very similar Duck Hunt game. I recommend you read and analyze its code. Its author developed it a little differently than me. He also added few additional sprite based animaitons like: a running dog at the start of the game and the falling of a shot duck. His code opened my mind and gave me solutions, of which I hadn’t thought of. It is very valuable reading!