 Sliding puzzle game in Phaser
The popularity of the Phaser game framework is growing rapidly. Let’s focus on the basics of this library by creating a simple puzzle sliding game.
As you probably already know, Phaser is one of the most popular free JavaScript frameworks made by Photonstorm. Its purpose is to help developers to create HTML5 games really quickly, by providing a set of tools which handle generic tasks; like loading images, game loops, inputs, physics; needed to program the game. With these taken care of, the developer can focus on their game idea, not wasting a time on rewriting or copying the same code between previous projects.
Setup and initialization
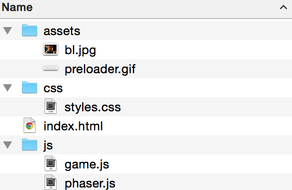 Folder structure of example Phaser project
Because of the nature of JavaScript and browser security features, we have to run the server to load resources required by the game. There are a few ways to do that but my favourite is using the Grunt task runner with the Yeoman scaffolding tool.
I found a nice Yeoman generator for Phaser and updated it with the newest Phaser version and amended the gruntfile. You can check out and use my current (still working in progress) setup in Github. If it’s easier for you, you can also take a look at the source code of the working sliding puzzle game.
Once we have everything set up and ready, let’s dive into the initialization of the Phaser framework. Our main folder consists only of the index.html file and js, css and assets folders.
In the index.html we need to include the aforementioned assets:
<!doctype html>
<head>
  <title>SlidingPuzzle</title>
  <link href="css/styles.css" rel="stylesheet" type="text/css">
</head>
<body>
  <div id="slidingpuzzle"></div>
  <script src="js/phaser.js"></script>
  <script src="js/game.js"></script>
</body>
</html>
As you can see, there is a div element with the slidingpuzzle id attribute. In our game.js file that id refers to the element in which we want to initialize the Phaser framework.
var game = new Phaser.Game(800, 600, Phaser.CANVAS,
'slidingpuzzle', { preload: preload, create: create });
The above line demonstrates how to initialize the Phaser instance, by setting a proper width and height, the method of rendering (it can be also Phaser.AUTO to detect WebGL with a fallback to canvas), the aforementioned id of the parent element and the list of used states in the game.
Game loop
We have two states in the game: preload and create. They will be fired in the same order as they are specified. The Phaser allows you to use more than those two, e.g. boot to show a loader but in this game we will use only two basic states.
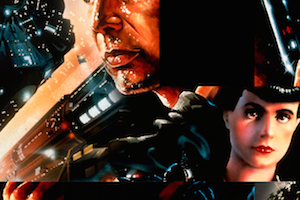
In the preload state we will only load the image which will be our background in the game:
var PIECE_WIDTH = 200,
    PIECE_HEIGHT = 200;

function preload() {
   game.load.spritesheet("background", "assets/bl.jpg", PIECE_WIDTH, PIECE_HEIGHT);
}
Our loaded spritesheet will be named background and it will be divided into frames 200x200 each. The canvas size is 800x600 so that means that on that board we will have 4 pieces in each row and 3 pieces in each column. This will be quite easy so if you need a bigger challenge, change the PIECE_WIDTH and PIECE_HEIGHT to smaller values, like 100.
Once the image has been loaded, Phaser will fire another state, create where we have the prepareBoard method:
var BOARD_COLS = Phaser.Math.floor(game.world.width / PIECE_WIDTH);
    BOARD_ROWS = Phaser.Math.floor(game.world.height / PIECE_HEIGHT);

piecesAmount = BOARD_COLS * BOARD_ROWS;
Based on the piece’s size we can easily calculate the amount of pieces on the board.
Now we need to create an array of shuffled indexes, so every piece will be identified by a single value from that array and therefore placed randomly on the board.
shuffledIndexArray = createShuffledIndexArray();

function createShuffledIndexArray() {
  var i,
      indexArray = [];

  for (i = 0; i < piecesAmount; i++) {
    indexArray.push(i);
  }

  return shuffle(indexArray);
}

function shuffle(array) {
  var counter = array.length,
      temp,
      index;

  while (counter > 0) {
    index = Math.floor(Math.random() * counter);

    counter--;

    temp = array[counter];
    array[counter] = array[index];
    array[index] = temp;
  }

  return array;
}
We just created a simple array in which length is equal to the amount of pieces. Then in the shuffle function, each of the elements are swapped with another randomly selected index, so as the result we get the array with shuffled indexes as values.
Now, after preparing the shuffled array, we need to create a special object called a group with pieces and assign the shuffled index to each of them.
piecesGroup = game.add.group();

  for (i = 0; i < BOARD_ROWS; i++)
  {
    for (j = 0; j < BOARD_COLS; j++)
    {
      if (shuffledIndexArray[piecesIndex]) {
          piece = piecesGroup.create(j * PIECE_WIDTH, i * PIECE_HEIGHT,
          "background", shuffledIndexArray[piecesIndex]);
      }
      else { //initial position of the black piece
          piece = piecesGroup.create(j * PIECE_WIDTH, i * PIECE_HEIGHT);
          piece.black = true;
      }
      piece.name = 'piece' + i.toString() + 'x' + j.toString();
      piece.currentIndex = piecesIndex;
      piece.destIndex = shuffledIndexArray[piecesIndex];
      piece.inputEnabled = true;
      piece.events.onInputDown.add(selectPiece, this);
      piece.posX = j;
      piece.posY = i;
      piecesIndex++;
    }
  }
The group in Phaser is a container for displaying objects like sprites, which easily allows you to apply transforms to all of the children.
After creating an empty group, we need to add each of the pieces to the group. Remember, that the piece here is just a fragment which we declared earlier background sprite.
If the shuffled index is not 0, we just create an element, by using the piecesGroup.create() method with the appropriate dimensions, sprite name, and shuffled index.
If the shuffled index equals 0, we can treat is as our black piece, so while creating an element, there is no need to specify the background sprite, because we want it to be black.
Every piece has a unique name, an index indicating current position, an index indicating end position and current coordinates on the board.
There is also an input enabled for every piece and a callback method called selectPiece when is fired when the user clicks on a piece.
function selectPiece(piece) {
    var blackPiece = canMove(piece);

    //if there is a black piece in neighborhood
    if (blackPiece) {
      movePiece(piece, blackPiece);
    }
}
Moving pieces
Before moving the piece, we need to be sure that there is a black piece in a close neighborhood. There is a canMove function which looks for a black block in every direction from the clicked piece:
function canMove(piece) {
  var foundBlackElem = false;

  piecesGroup.children.forEach(function(element) {
    if (element.posX === (piece.posX - 1) && element.posY === piece.posY && element.black ||
        element.posX === (piece.posX + 1) && element.posY === piece.posY && element.black ||
        element.posY === (piece.posY - 1) && element.posX === piece.posX && element.black ||
        element.posY === (piece.posY + 1) && element.posX === piece.posX && element.black) {
          foundBlackElem = element;
          return;
    }
  });

  return foundBlackElem;
}
For each piece we check whether in its neighbourhood there is a a black piece and its position relative to the clicked element. If a black piece is found it is returned as the result of the function.
After detecting if there is a black element in the neighborhood, all we need to do now is to switch positions of these two (selected and black) pieces.
function movePiece(piece, blackPiece) {
  var tmpPiece = {
    posX: piece.posX,
    posY: piece.posY,
    currentIndex: piece.currentIndex
  };

  game.add.tween(piece).to({x: blackPiece.posX * PIECE_WIDTH, y: blackPiece.posY * PIECE_HEIGHT}, 300, Phaser.Easing.Linear.None, true);

  //change places of piece and blackPiece
  piece.posX = blackPiece.posX;
  piece.posY = blackPiece.posY;
  piece.currentIndex = blackPiece.currentIndex;
  piece.name ='piece' + piece.posX.toString() + 'x' + piece.posY.toString();

  //piece is the new black
  blackPiece.posX = tmpPiece.posX;
  blackPiece.posY = tmpPiece.posY;
  blackPiece.currentIndex = tmpPiece.currentIndex;
  blackPiece.name ='piece' + blackPiece.posX.toString() + 'x' + blackPiece.posY.toString();

  //after every move check if puzzle is completed
  checkIfFinished();
}
tmpPiece is an object which keeps the clicked piece’s coordinates and the current index value. game.add.tween(piece).to() is a method which fires the tween animation. It just means that we ask a clicked piece to slightly move towards the new position. In this case, the black piece’s current position. You can read more about animations in Phaser’s documentation.
Showing animation of the movement is not enough. Our board does not ‘know’ yet about the changes we’ve made. That’s why in the next steps, we need to update the clicked and the black boxes’ coordinates, index and unique name.
Every time the blocks move, we need to check if the board is in the completed position:
function checkIfFinished() {
  var isFinished = true;

  piecesGroup.children.forEach(function(element) {
    if (element.currentIndex !== element.destIndex) {
      isFinished = false;
      return;
    }
  });

  if (isFinished) {
    showFinishedText();
  }
}

function showFinishedText() {
  var style = { font: "40px Arial", fill: "#000", align: "center"},
      text = game.add.text(game.world.centerX, game.world.centerY, "Congratulations! \nYou made it!", style);

  text.anchor.set(0.5);
}
To check if the game is completed, we loop through the elements and check if the index of the current position matches the end position.
When the game is finished, we can show a ‘Congratulation’ text to the user. We can achieve that by using the game.add.text() and text.anchor.set() methods.
Conclusion
That’s it! You’ve created a very easy puzzle game in Phaser using many of the built-in capabilities of the framework. If you want to explore further you could try implementing scores, an option to change the background image or functionality to share your best score on facebook.