 Swift - my first arcade canvas game
This time I would like to show you how easily you can develop a simple arcade game in canvas element. As an example, I will use a Swift game which I made for 2012's edition of JS13KGames.
It's important to mention, that all of the mechanics of this game is strongly inspired by the Swift Stitch game made by Sophie Houlden. I found her game very entertaining, because of the perfect combination of easy to learn rules and hard to play gameplay. I thought this could be a nice example to build a similar game with almost the same rules and easier and customized levels. If you find my version of the game too easy and want to play something more challenging - give the original Swift Stitch game a try. The real fun starts when you reach 'gravity' levels ;).
The game loop
The game loop, according to Wikipedia and gamedev.tutplus, is the central component of any game, which is responsible for keeping your game runnig. Within that infinite loop, all actions like: rendering a level, player or enemy, counting scores, resolving collisions, detecting user's input or playing sounds are taken care of.
function run(){
  animationId = requestAnimationFrame(run);
  animate();
}
function animate(){
_context.clearRect(0, 0, 800, 600);
//draw information about current level and lives
drawInfo();
//draw change mode lines, last one is end of level
drawChangeModeLines();
//show ship
Ship.draw(_posX,_posY,0);
//draw level
drawLevelShape();
//set shift variables for next animation step
moveWholeLevel();
//check if ship is on change mode line
//if yes, then change _up or _right mode
changeModesOnSpecialLines();
//stop the game when ship hits the wall
detectCollision();
}I think that the above code speaks for itself. The requestAnimationFrame() function is an API for performing optimized animations in browsers. It's the best alternative to commonly used but not so efficient setInterval() function. To help you understand better, I recommend you to get acquainted with Paul Irish's post first.
During the animation (every 1000/60 ms) everything inside animate() is executed. First the canvas needs to be cleared, then every game's element is drawn, including: information about the current level and player's lives, a ship which the user controls, borders of the level and special lines, on which the ship changes its direction.
The drawInfo() function is the easiest part of the whole game. It is just a simple function responsible for drawing information about user's status: current level and the amount of available lives. I used standard _context.fillStyle, _context.font and _context.fillText() methods and properties to show subtitles.
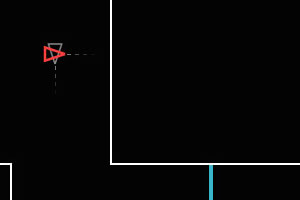
The whole code responsible for drawing the ship is placed within the (surprisingly!) Ship object. As you probably noticed so far, the ship is represented as a standard red or grey triangle. It's not my intention here to show how to draw basic shapes in canvas element. If you need to catch up with that, you can start with my Introduction to HTML5 canvas element article.
Drawing levels and special lines
Lets continue with something more interesting. The most important part of this game is the mechanism to draw different levels in such way, that it will be easy enought to detect if the ship hits the border. I also had to have in mind, that the size of my game is limited to 13 kilobytes. As you see, proper method of drawing and detecting borders of levels was essential part of the implementation. After at least a few hours of intensive thinking, I came across my JS1K 'Love' demo and I remembered one particular canvas method, which turned out to be my perfect solution: _context.isPointInPath(). All I needed to implement afterwards, was to:
- Draw a large geometric black figure with only white visible borders, so it could imitate the whole level.
- Place the ship inside of that figure.
- During the animation, use
_context.isPointInPath()to check if the ship's position is in the path of the of the drawn figure (level).
This is it! I didn't need to detect collisions with borders by myself, because canvas already implemented useful _context.isPointInPath() method. After figuring it out, I could finally focus on drawing custom level shapes.
I used an array of objects to store important information about each level, which are represented by coordinates of all points connecting the figure. The first level is stored as followed:
_level = [
    [{x:0,y:100},{x:1000,y:100},{x:1000,y:600},{x:1400,y:600},{x:1400,y:1200},
    {x:1800,y:1200},{x:1800,y:1400},{x:1200,y:1400},{x:1200,y:800},{x:800,y:800},
    {x:800,y:300},{x:0,y:300},{x:0,y:100}]
],
Now the figure can be drawn by using _context.lineTo() method:
function drawLevelShape(){
    var i;
    _context.beginPath();
    _context.lineWidth = 2;
    _context.strokeStyle = _stroke;

    for(i = 0; i<_level[_lvl].length; i++){
        _context.lineTo(_level[_lvl][i].x-_shiftX,_level[_lvl][i].y-_shiftY);
    }

    _context.stroke();
    _context.closePath();
}
A very similar solution is used for storing and drawing change mode lines:
_lines = [
	[{x1:800,y1:400,x2:1000,y2:400,vert:false,mode:false},
	{x1:0,y1:802,x2:200,y2:802,vert:false,mode:false},
	{x1:979,y1:900,x2:979,y2:1100,vert:true,mode:true}]
],
The above example shows lines for the third level. First four values (x1,y1,x2,y2) are coordinates of the start and end points of the lines. The vert flag means if the line is vertical (true) or horizontal (false). The mode is for identifying which course the ship will change after crossing the line: true is for vertical mode, false for horizontal. The last line is always the end of level, so mode flag is not important.
function drawChangeModeLines(){
    var i;
    _context.lineWidth = 4;
    for(i = 0; i<_lines[_lvl].length; i++){
        _context.beginPath();
        if(i===_lines[_lvl].length-1){//last one is end of level, so red color
            _context.strokeStyle = '#FF4040';
        }
        else if(_lines[_lvl][i].mode){ //blue
            _context.strokeStyle = '#37B6CE';
        }
        else{ //green
            _context.strokeStyle = '#00BD39';
        }
        _context.lineTo(_lines[_lvl][i].x1-_shiftX,_lines[_lvl][i].y1-_shiftY);
        _context.lineTo(_lines[_lvl][i].x2-_shiftX,_lines[_lvl][i].y2-_shiftY);
        _context.stroke();
        _context.closePath();
    }
}
How does drawing level and special lines look in a different way:


How does the whole game loop work?
As I mentioned a few paragraphs before, after drawing the level, the ship must be placed inside, directly in the center of playing area. The ship has its own coordinates (_posX = 400,_posY = 190) which has to be constant during the whole game. Only the coordinates of level and special lines moves every animation step. This is why the _shiftX and _shiftY variables are used. It depends on which action the user takes, those mentioned shift variables changes the direction of ship (de facto coordinates of the level and special lines). All of the *magic* is placed inside moveWholeLevel() function:
function moveWholeLevel(){
    if(_position){
        if(_up){
        	_shiftY -= _v[_lvl];
        }
        else {
            _shiftY += _v[_lvl];
        }
    }
    else{
        if(_right){
            _shiftX += _v[_lvl];
        }
        else{
            _shiftX -= _v[_lvl];
        }
    }
}
The _position, _right and _up flags are changed after the user clicks the mouse (or touches the screen). The _v variable is an array of velocities for each level.
_v = [2,2,3,3,4,4,5,5,4,5] //velocity of each levelThe higher the velocity value, the faster the coordinates of each level change. According to the above example, the fastest levels are: 7th, 8th and 10th.
Maybe the following examples will help you understand how the movement in each level works and what is happening when the user clicks the mouse (or touches the screen):


We also have to remember about checking if the user didn't hit the wall. Since we can use _context.isPointInPath(), it's an easy task:
function detectCollision(){
    if (!_context.isPointInPath(_posX-_shipDim,_posY-_shipDim)
    	|| !_context.isPointInPath(_posX+_shipDim,_posY-_shipDim)
    	|| !_context.isPointInPath(_posX-_shipDim,_posY+_shipDim)
    	|| !_context.isPointInPath(_posX+_shipDim,_posY+_shipDim)){
        cancelAnimationFrame(_animationId);
        _lives--;
        if(_lives){
            resetOptions();
            showInfo(100);
        }
        else{ //game over
            _lvl=0;
            resetOptions();
            _lives = 5;
            showInfo(99);
        }
    }
}
When any side of the ship hits the border of level, then the whole game animation is stopped and the total amount of player's lives is reduced. If the user still has any lives left, he/she can face the current level again. Otherwise, the player is forced to start whole game from the beginning.
Conclusion
As you can see, programming arcade games in canvas is truly an easy task ;). All you need to do is:
- Have a clever idea.
- Choose the easiest way of implementation. (I know it's the hardest part, especially for beginners.)
- Work hard.
- Work even harder.
As always, the whole code explained here is available on github. If you have any suggestions or improvements, I would be delighted to look into it!